EFT 타점과 기술 Tapping Locations & Technique
EFT 타점과 기술 Tapping Locations & Technique
자료출처 http://eft.mercola.com/
아래 자료는 EFT가 무엇인지 말해 주는 영어자료입니다.
심리학적인 침술이라고 분명하게 말해 주고 있다는 것을 시작부터 발견하실 수가 있습니다.
이런 반기독교적인 치료를 목회상담이라고 가르치니 매우 큰 일입니다.
칼 융의 분석심리학과 신성한 내면아이 개념을 이해하지 못하면
심리학과 내적치유 방향성들을 알 수가 없습니다.
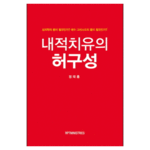
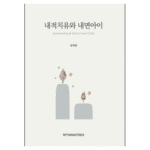
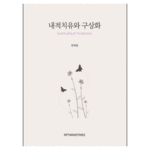
"내적치유와 내면아이", "내적치유와 구상화"를 꼭 읽어 보시기 바랍니다.
http://mall.godpeople.com/?Tno=wel2c&key=%C1%A4%C5%C2%C8%AB&plus_key=%C1%A4%C5%C2%C8%AB
----------------- 자료 인용 시작 ------------------------
Tapping Locations & Technique
There are two basic areas to learn in order to use EFT: the tapping locations and technique, and the positive affirmations. These areas, as well as some advanced EFT principles and techniques, are covered in the following sections.
You should be able to successfully treat many problems by diligently applying the following instructions.
If you are not getting the results you would like, or you have a particularly traumatic issue, please do not give up! Instead, consider consulting with an EFT professional. Dr. Patricia Carrington has some guidelines on selecting an EFT therapist, followed by a list of EFT practitioners throughout the U.S. and world. Many of these therapists even offer a free 15-minute phone session in which you can ask them questions to see if you connect.
Proper EFT Tapping
The basic EFT sequence is straightforward and generally takes my patients only a few minutes to learn. They have the slight advantage of me personally showing them the tapping points, but you should be able to pick up these points relatively quickly. With a little practice, you will be performing each round in under a minute.
NOTE: While it is important to tap the correct area, you need not worry about being absolutely precise, as tapping the general area is sufficient.
It's All in the Fingertips
The first thing to understand is that you will be tapping with your fingers. There are a number of acupuncture meridians on your fingertips, and when you tap with your fingertips you are also likely using not only the meridians you are tapping on, but also the ones on your fingers.
Traditional EFT has you tapping with the fingertips of your index finger and middle finger and with only one hand. Either hand works just as well. Most of the tapping points exist on either side of the body, so it doesn't matter which side you use, nor does it matter if you switch sides during the tapping. For example, you can tap under your right eye and, later in the tapping, under your left arm.
I modified this approach slightly by having you use both hands and all your fingers, so that they are gently relaxed and form a slightly curved natural line. The use of more fingers allows you to access more of the acupuncture points. When you use all your fingers you will cover a larger area than just tapping with one or two fingertips, and this will allow you to cover the tapping points more easily.
However, many obtain quite successful results with the traditional one-handed two-finger approach. You can use either method, but I tend to use my modified version in an effort to be more complete.
Ideally, you will want to use your fingertips, not your finger pads as they have more meridian points. However, if you are a woman with long fingernails you should of course use your finger pads (otherwise you may end up stabbing yourself).
You should also remove your watch and bracelets, as that will interfere with your use of the wrist meridian tapping.
Tap Solidly - But Don't Hurt Yourself!
You should tap solidly, but never so hard as to hurt or bruise yourself.
If you decide to use both hands, I recommend slightly alternating the tapping so that each hand is slightly out of phase with the other and you are not tapping with both hands simultaneously. This provides a kinesthetic variant of the alternating eye movement work that is done in EMDR and may have some slight additional benefit.
When you tap on the points outlined below, you will tap about 5-7 times. The actual number is not critical, but ideally should be about the length of time it takes for one full breath. There is probably a distinct benefit for tapping through one complete respiration cycle.
Please notice that these tapping points proceed down the body. That is, each tapping point is below the one before it. That should make it a snap to memorize. A few trips through it and it should be yours forever. However, unlike TFT, the sequence is not critical. You can tap the points in any order and sequence, just so long as all the points are covered. It just is easier to go from top to bottom to make sure you remember to do them all.
Remove your Glasses and Watch Prior to Tapping
Glasses and watches can mechanically and electromagnetically interfere with EF, so I advise everyone to remove them prior to tapping. For quick sessions conducted upon yourself, this is not critical, as you can easily tap around them, but I think there is always a benefit to removing them when possible.
Using EFT in Public: Eliminating any Embarrassment
Many people are concerned about embarrassing themselves by using EFT in public, especially when implementing my revision of it, which really makes one stand out in a crowd.
After a while of using and perfecting the technique - in private quarters, if you prefer - you will be able to use only two fingers of one hand, and to say the affirmation softly under your breath or silently. This way you can do EFT in just about any social setting, and if people even notice what you are doing at all, it will appear to them that you are merely thinking.
Finding the Right Tapping Points
The tapping points, and their abbreviations, are explained below, followed by a chart of the points. They are presented below in the exact order in which they should be tapped.
1. Top of the Head (TH)

With fingers back-to-back down the center of the skull.
2. Eyebrow (EB)

Just above and to one side of the nose, at the beginning of the eyebrow.
3. Side of the Eye (SE)

On the bone bordering the outside corner of the eye.
4. Under the Eye (UE)

On the bone under an eye about 1 inch below your pupil.
5. Under the Nose (UN)

On the small area between the bottom of your nose and the top of your upper lip.
6. Chin (Ch)

Midway between the point of your chin and the bottom of your lower lip. Even though it is not directly on the point of the chin, we call it the chin point because it is descriptive enough for people to understand easily.
7. Collar Bone (CB)

The junction where the sternum (breastbone), collarbone and the first rib meet. This is a very important point and in acupuncture is referred to as K (kidney) 27. To locate it, first place your forefinger on the U-shaped notch at the top of the breastbone (about where a man would knot his tie). From the bottom of the U, move your forefinger down toward the navel 1 inch and then go to the left (or right) 1 inch. This point is referred to as Collar Bone even though it is not on the collarbone (or clavicle) per se.
8. Under the Arm (UA)

On the side of the body, at a point even with the nipple (for men) or in the middle of the bra strap (for women). It is about 4 inches below the armpit.
9. Wrists (WR)
The last point is the inside of both wrists.
The abbreviations for these points are summarized below in the same order as given above. It is, again, the order in which they should be tapped:

TH = Top of Head
EB = Eye Brow
SE = Side of the Eye
UE = Under the Eye
UN = Under the Nose
Ch = Chin
CB = Collar Bone
UA = Under the Arm
WR = Wrists
------------- 자료 인용 끝 --------------------------
RPTministries 정태홍 목사
http://www.esesang91.com
http://twtkr.com/rptministries
http://www.facebook.com/RPTministries
자료출처 http://eft.mercola.com/
아래 자료는 EFT가 무엇인지 말해 주는 영어자료입니다.
심리학적인 침술이라고 분명하게 말해 주고 있다는 것을 시작부터 발견하실 수가 있습니다.
이런 반기독교적인 치료를 목회상담이라고 가르치니 매우 큰 일입니다.
칼 융의 분석심리학과 신성한 내면아이 개념을 이해하지 못하면
심리학과 내적치유 방향성들을 알 수가 없습니다.
"내적치유와 내면아이", "내적치유와 구상화"를 꼭 읽어 보시기 바랍니다.
http://mall.godpeople.com/?Tno=wel2c&key=%C1%A4%C5%C2%C8%AB&plus_key=%C1%A4%C5%C2%C8%AB
----------------- 자료 인용 시작 ------------------------
Tapping Locations & Technique
There are two basic areas to learn in order to use EFT: the tapping locations and technique, and the positive affirmations. These areas, as well as some advanced EFT principles and techniques, are covered in the following sections.
You should be able to successfully treat many problems by diligently applying the following instructions.
If you are not getting the results you would like, or you have a particularly traumatic issue, please do not give up! Instead, consider consulting with an EFT professional. Dr. Patricia Carrington has some guidelines on selecting an EFT therapist, followed by a list of EFT practitioners throughout the U.S. and world. Many of these therapists even offer a free 15-minute phone session in which you can ask them questions to see if you connect.
Proper EFT Tapping
The basic EFT sequence is straightforward and generally takes my patients only a few minutes to learn. They have the slight advantage of me personally showing them the tapping points, but you should be able to pick up these points relatively quickly. With a little practice, you will be performing each round in under a minute.
NOTE: While it is important to tap the correct area, you need not worry about being absolutely precise, as tapping the general area is sufficient.
It's All in the Fingertips
The first thing to understand is that you will be tapping with your fingers. There are a number of acupuncture meridians on your fingertips, and when you tap with your fingertips you are also likely using not only the meridians you are tapping on, but also the ones on your fingers.
Traditional EFT has you tapping with the fingertips of your index finger and middle finger and with only one hand. Either hand works just as well. Most of the tapping points exist on either side of the body, so it doesn't matter which side you use, nor does it matter if you switch sides during the tapping. For example, you can tap under your right eye and, later in the tapping, under your left arm.
I modified this approach slightly by having you use both hands and all your fingers, so that they are gently relaxed and form a slightly curved natural line. The use of more fingers allows you to access more of the acupuncture points. When you use all your fingers you will cover a larger area than just tapping with one or two fingertips, and this will allow you to cover the tapping points more easily.
However, many obtain quite successful results with the traditional one-handed two-finger approach. You can use either method, but I tend to use my modified version in an effort to be more complete.
Ideally, you will want to use your fingertips, not your finger pads as they have more meridian points. However, if you are a woman with long fingernails you should of course use your finger pads (otherwise you may end up stabbing yourself).
You should also remove your watch and bracelets, as that will interfere with your use of the wrist meridian tapping.
Tap Solidly - But Don't Hurt Yourself!
You should tap solidly, but never so hard as to hurt or bruise yourself.
If you decide to use both hands, I recommend slightly alternating the tapping so that each hand is slightly out of phase with the other and you are not tapping with both hands simultaneously. This provides a kinesthetic variant of the alternating eye movement work that is done in EMDR and may have some slight additional benefit.
When you tap on the points outlined below, you will tap about 5-7 times. The actual number is not critical, but ideally should be about the length of time it takes for one full breath. There is probably a distinct benefit for tapping through one complete respiration cycle.
Please notice that these tapping points proceed down the body. That is, each tapping point is below the one before it. That should make it a snap to memorize. A few trips through it and it should be yours forever. However, unlike TFT, the sequence is not critical. You can tap the points in any order and sequence, just so long as all the points are covered. It just is easier to go from top to bottom to make sure you remember to do them all.
Remove your Glasses and Watch Prior to Tapping
Glasses and watches can mechanically and electromagnetically interfere with EF, so I advise everyone to remove them prior to tapping. For quick sessions conducted upon yourself, this is not critical, as you can easily tap around them, but I think there is always a benefit to removing them when possible.
Using EFT in Public: Eliminating any Embarrassment
Many people are concerned about embarrassing themselves by using EFT in public, especially when implementing my revision of it, which really makes one stand out in a crowd.
After a while of using and perfecting the technique - in private quarters, if you prefer - you will be able to use only two fingers of one hand, and to say the affirmation softly under your breath or silently. This way you can do EFT in just about any social setting, and if people even notice what you are doing at all, it will appear to them that you are merely thinking.
Finding the Right Tapping Points
The tapping points, and their abbreviations, are explained below, followed by a chart of the points. They are presented below in the exact order in which they should be tapped.
1. Top of the Head (TH)
With fingers back-to-back down the center of the skull.
2. Eyebrow (EB)
Just above and to one side of the nose, at the beginning of the eyebrow.
3. Side of the Eye (SE)
On the bone bordering the outside corner of the eye.
4. Under the Eye (UE)
On the bone under an eye about 1 inch below your pupil.
5. Under the Nose (UN)
On the small area between the bottom of your nose and the top of your upper lip.
6. Chin (Ch)
Midway between the point of your chin and the bottom of your lower lip. Even though it is not directly on the point of the chin, we call it the chin point because it is descriptive enough for people to understand easily.
7. Collar Bone (CB)
The junction where the sternum (breastbone), collarbone and the first rib meet. This is a very important point and in acupuncture is referred to as K (kidney) 27. To locate it, first place your forefinger on the U-shaped notch at the top of the breastbone (about where a man would knot his tie). From the bottom of the U, move your forefinger down toward the navel 1 inch and then go to the left (or right) 1 inch. This point is referred to as Collar Bone even though it is not on the collarbone (or clavicle) per se.
8. Under the Arm (UA)
On the side of the body, at a point even with the nipple (for men) or in the middle of the bra strap (for women). It is about 4 inches below the armpit.
9. Wrists (WR)
The last point is the inside of both wrists.
The abbreviations for these points are summarized below in the same order as given above. It is, again, the order in which they should be tapped:
TH = Top of Head
EB = Eye Brow
SE = Side of the Eye
UE = Under the Eye
UN = Under the Nose
Ch = Chin
CB = Collar Bone
UA = Under the Arm
WR = Wrists
------------- 자료 인용 끝 --------------------------
RPTministries 정태홍 목사
http://www.esesang91.com
http://twtkr.com/rptministries
http://www.facebook.com/RPTministries
독자 의견
댓글이 없습니다.